Checkeeper Mail: Getting Started
Howdy, partner! We understand that creating, printing, stamping, and mailing your own checks can take up a lot of your time (and money). We are proud to offer you more flexibility for your checking needs with our fulfillment service: Checkeeper Mail! This article will guide you on how to get checks into the hands of the right person, in the most hands-off way possible.
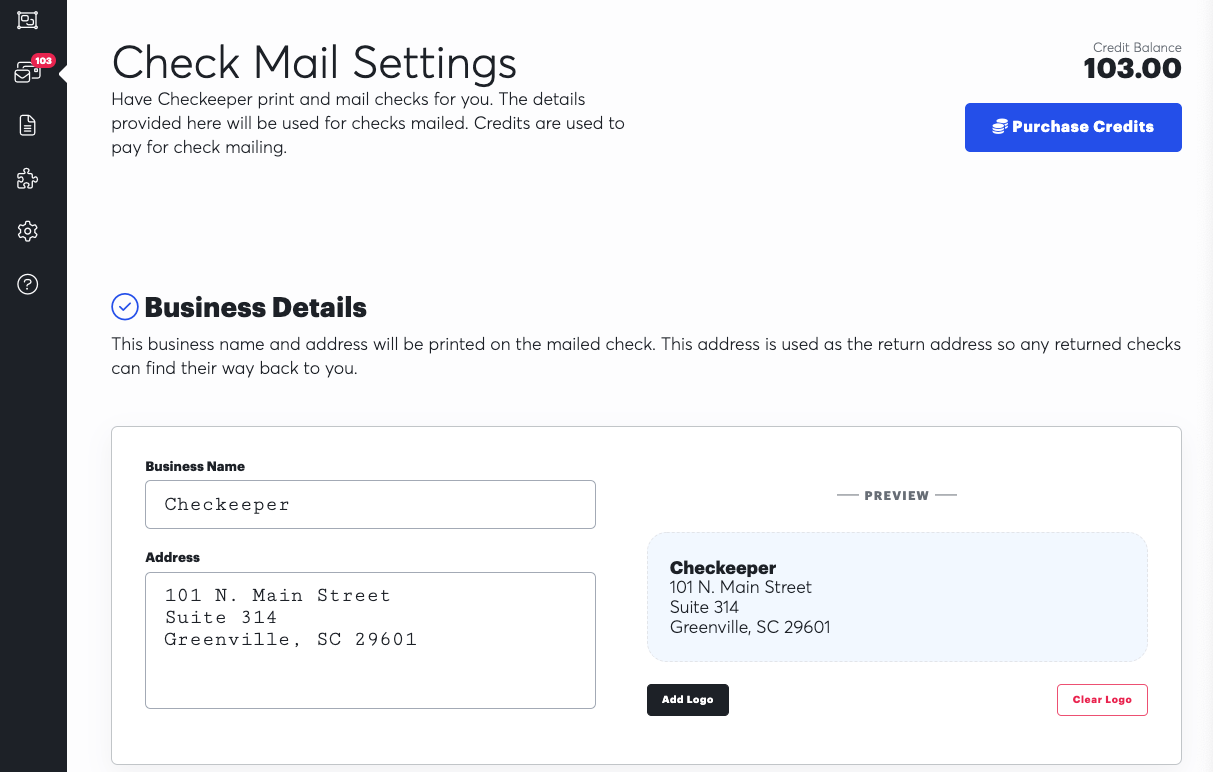
Once you log in to your account, begin by navigating to the "Check Mailing" tab on the left sidebar as shown above. You will input your preferred return address, an image of a logo, bank account information, and signature. The details you enter here will be printed on the checks you submit for mailing, so make sure to double check everything.
– Adding a logo is not required, but it can give your checks a more personal touch. This image will be printed to the left of your return address on the check.
Credits
Now that your mail settings are filled out, it's time to purchase credits. From the same "Check Mailing" screen, click the black "Purchase Credits" button. You cannot proceed with mailing unless you have credits in your account. In short, (1) credit = one check printed, stuffed in a double window envelope and mailed First-Class USPS. Extra services cost extra credits, but that rate changes frequently to get you the best deal.
– You can select credits in the following increments: 10, 20, 50, 100, or 500.
– Credits never expire.
Attachments
You can easily build and customize an invoice table onto each check you write with Checkeeper, but sometimes it’s necessary to attach documentation to a check as well. If you ever find yourself needing to attach a file or image directly to a check, you can do so easily, either while you’re writing a new check, or by editing an existing check. And yes, you can mail them too! You will then have the option to indicate whether you wish to have the attachment mailed with the check, or if you just want it for your own records. Finally, visit Settings > Defaults to choose a default toggle setting (always mail attachment with check or always keep for your own records).
Select Your Checks
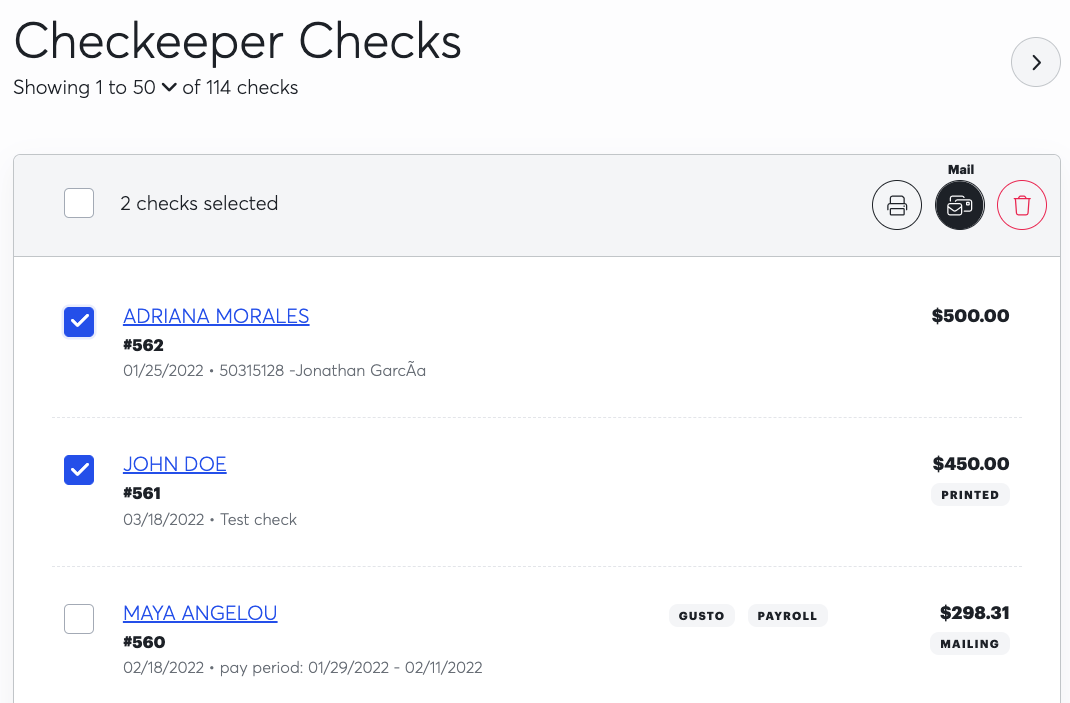
You're ready to send those checks our way! Head back to your check registry by clicking on the "Checks" tab on the left sidebar. Select the check(s) you want to mail by clicking the box to the left of the check number. Then, click the blue "Mail Checks" button and you will be directed to the shipping methods page.
Shipping Method Options
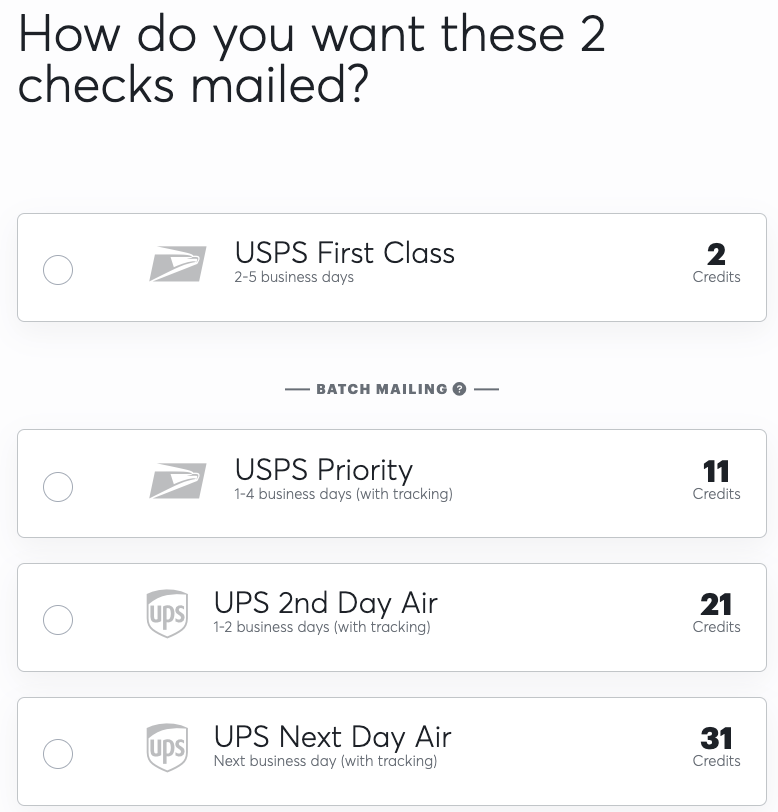
Our standard mailing option is USPS First Class. (Please note: There are new changes happening at the US Postal Service. It will add 1-2 days to the delivery time for long distance First Class mail. Our fulfillment center is located in South Carolina, so if you were to submit a check to be sent to California or surrounding states it could take up to 5 days.)
- (1) credit per check mailed
- USPS does not provide tracking information for First Class mail
USPS Priority (1 - 3 business days)
- 10 base credits + 0.5 credits per check mailed
- Tracking number provided
UPS 2 Day
- 20 base credits + 0.5 credits per check mailed
- Tracking number provided
UPS Next Day (overnight)
- We always recommend this option for those running payroll to ensure delivery to your employees
- 30 base credits + 0.5 credits per check mailed
- Tracking number provided
The Last Glance
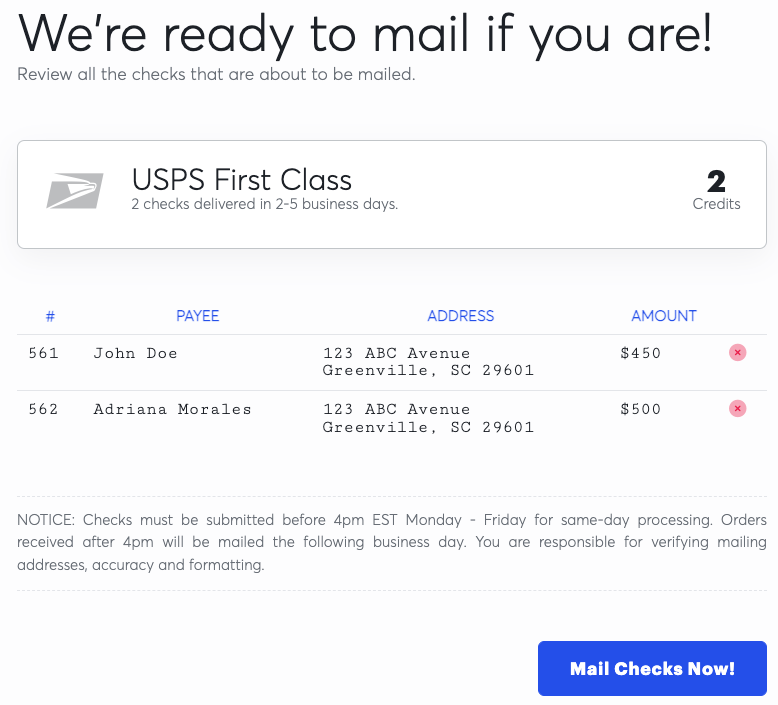
After you select your desired shipping method, you will see a summary page with the information of the checks you are mailing. As stated in the fine print of the image above: you are responsible for verifying mailing addresses, accuracy and formatting. Please take a moment to make sure the information is correct and then you can smash that "Mail Checks Now!" button. If you chose USPS First Class, this is your last step. The address you entered for your payee will be printed on the check and that is where it will be sent.
USPS Priority, UPS 2 Day, and UPS Next Day
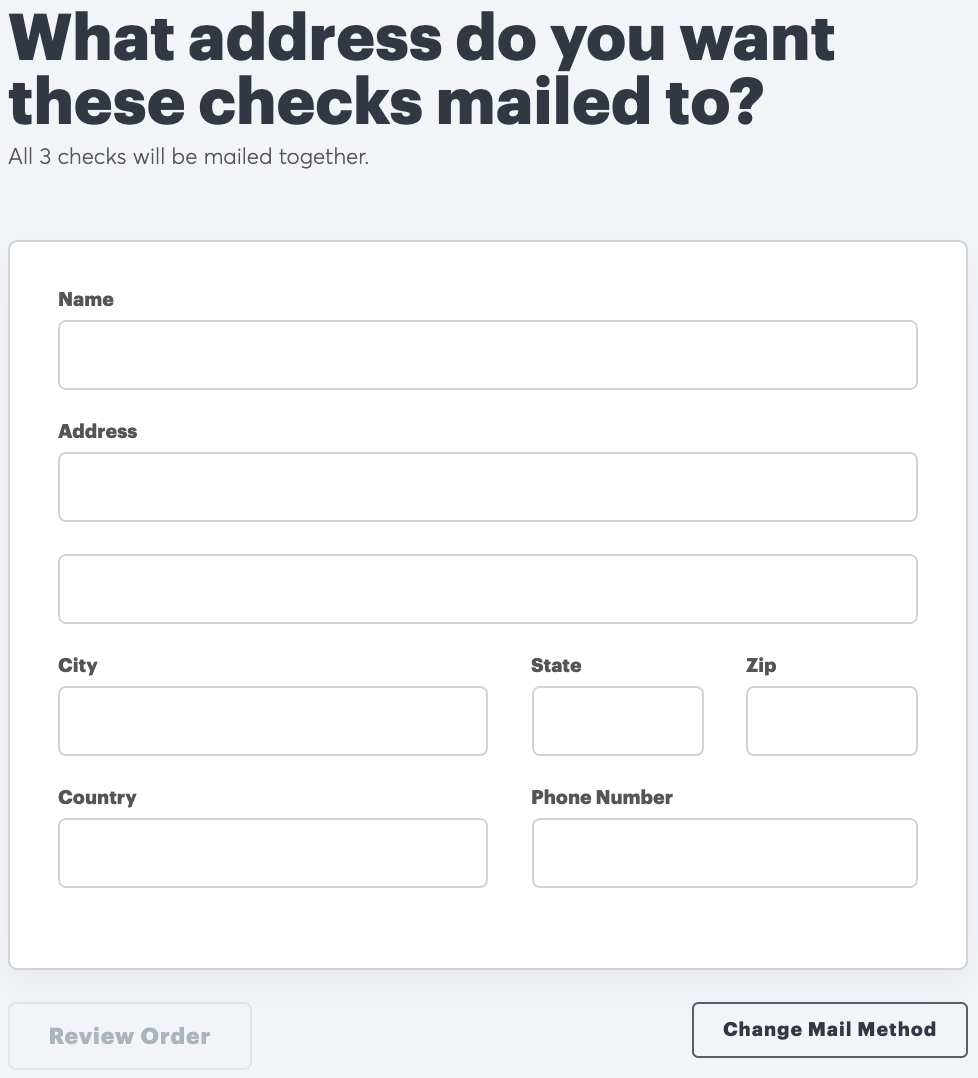
If you selected Priority or Next Day shipping, you are a few keyboard clicks away from mailing your checks! Simply fill out where you want us to send your checks, review and submit your order, and we'll take care of the rest.
Checkeeper Mail FAQs
Why can't I purchase credits?
- New Checkeeper accounts have a 24-hour probation period before credits can be purchased. Accounts must be vetted and verified before we'll start mailing your checks. Safety first!
What if I need to cancel a check I submitted for mailing?
- The void action in your check registry will not cancel a check you have mailed. You will need to contact your bank to prevent further actions.
Can I send checks to different locations with USPS Priority or UPS Next Day?
- Checks are bundled into the same package. If you want checks sent to different addresses, you will have to submit separate orders for each location with their respective checks.
What banking information is on the check?
- Your business banking information is used to issue the checks. Checkeeper does not touch your funds in any way. It's as if you wrote the checks yourself!